I’m learning Red Hat OpenShift and needed somewhere to practice. Red Hat provides an OCP installation called OpenShift Local that can be stood up on relatively modest hardware. It’s advertised system requirements are:
- 4 CPU cores
- 9GB of RAM
- and 35GB of storage space
If you have the hardware, and a Red Hat Developer login, navigate over to console.redhat.com to get started. If you don’t already have a Red Hat Developer login, why not get one, they’re free, and available at developers.redhat.com.
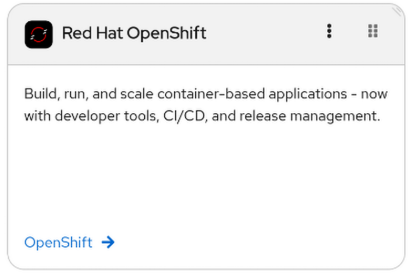
Once logged in at console.redhat.com, click the blue Openshift link in the Red Hat OpenShift tile:
Then choose Cluster List from the left side menu. You will be greeted with a page that says “Let’s create your first cluster”. Let’s do that by clicking on the blue Create Cluster button, and then clicking on Local from the types of available OpenShift distributions.

Choose your hosting OS and architecture from the dropdown. Red Hat provides the OpenShift Local installer for Linux, MacOS, and Windows. I was successful at installing OpenShift Local on a Fedora42 laptop, a RHEL8.10 desktop, and even inside a RHEL8.10 virtual machine.
Click the Download OpenShift Local button to start your download. Also click the Download pull secret button to download a text file that you’ll need to copy and paste in at install time.
When both of these downloads have finished on your target system, you’ll want to extract them into a working directory. I’m working in Linux, and my home directory is at /home/dan. The download from Red Hat is shipped as an LZMA2 compressed (xz) TAR archive, so I’ll use the capital ‘J’ argument to TAR to decompress it:
[dan@rhel8] tar -Jxvf crc-linux-2.51.0-amd64.xz
This will extract the download to a directory named crc-linux-2.51.0-amd64. Change to this directory and then temporarily add it to your file path like this:
[dan@rhel8] PATH=$PATH:$(pwd)
Start the setup process for Openshift Local by giving the command crc setup from within the crc-linux-2.51.0-amd64 directory. This is a lengthy setup, so be patient. This setup also includes a preflight that checks your environment for suitability, so if you’re missing anything (not enough RAM, disk space, etc.) crc setup will find it and let you know what you need to do in order to proceed.
You’ll know that crc setup has successfully completed when you see the message: “Your system is correctly setup for using CRC. Use ‘crc start’ to start the instance“
Next, do exactly what setup said to do and run crc start. This command will run some additional pre-start tasks, and then ask you to paste in the pull secret you downloaded along with the installer. I just used cat to display the contents of the pull secret file in another terminal and then copied and pasted them into the terminal running the cluster startup, pressed enter, and OpenShift cluster startup continued.
My processor core-count and available RAM are relatively modest, so full cluster startup took a little over 10 minutes, but the wait was totally worth it, because after cluster startup completed, I was greeted with the message “Started the OpenShift cluster” along with login information for both the Web Console and the OpenShift CLI utility oc. From here I could either use oc login to get started, or open Firefox on the provided URL to begin exploring the Web Console.
One thing to note if starting out with oc at the command line. The oc utility is included, but not currently on your path, execute the following command to fix this:
[dan@rhel8] eval $(crc oc-env)
Now I can log in:
[dan@rhel8] oc login -u kubeadmin -p <paste in the provided password> https://api.crc.testing:6443
And that’s it. The setup and install are really straightforward and can be accomplished in about 30 minutes providing a feature-complete OpenShift sandbox that can be used to prepare for certification exams, or as a pre-prod test system.
DCD
UPDATE:
I wanted to run OpenShift Local cluster on my lab server’s more capable hardware and access the Web Console from my laptop on the couch. Here’s what I needed to configure.
The web console is exposed and made available on the cluster host at the URL: console-openshift-console.apps-crc.testing.
You able see this with the oc command (output trimmed):
oc get route -n openshift-console console

NAME HOST/PORT PATH SERVICES
console console-openshift-console.apps-crc.testing console
To make this URL available to my laptop, I needed to place the following entry in my laptop’s /etc/hosts file:
192.168.xxx.xxx api.crc.testing canary-openshift-ingress-canary.apps-crc.testing console-openshift-console.apps-crc.testing default-route-openshift-image-registry.apps-crc.testing downloads-openshift-console.apps-crc.testing host.crc.testing oauth-openshift.apps-crc.testing
Where 192.168.xxx.xxx is the IP address of the cluster host running OpenShift Local.
Note: Make this easy on yourself and copy it from the block in the /etc/hosts file on the cluster host placed there when you ran ‘crc start’ earlier. It’ll be between the tags ‘# Added by CRC’ and ‘# End of CRC section’.
I also need to open up the cluster host’s firewall on port 80 and 443:
firewall-cmd --perm --add-port={80/tcp,443/tcp}
firewall-cmd --reload
Now I can point a web browser on my laptop to https://console-openshift-console.apps-crc.testing and the request gets routed over to the cluster host and displayed on my laptop.
